7 Reclaimed Wood Walls That Add Instant Character You’ll Brag About
You know that one room in your house that feels like it’s missing a soul? A reclaimed wood wall is the fastest way to fix that. It’s warm, textured, and a little rebellious—like your home suddenly developed a great backstory.
Whether you’re going for rustic cabin, modern loft, or coastal cool, these seven reclaimed wood wall ideas bring serious personality. And yes, they’re DIY-friendly if you can handle a level, a nail gun, and the occasional splinter (worth it).
1. The Moody Feature Wall That Steals the Show
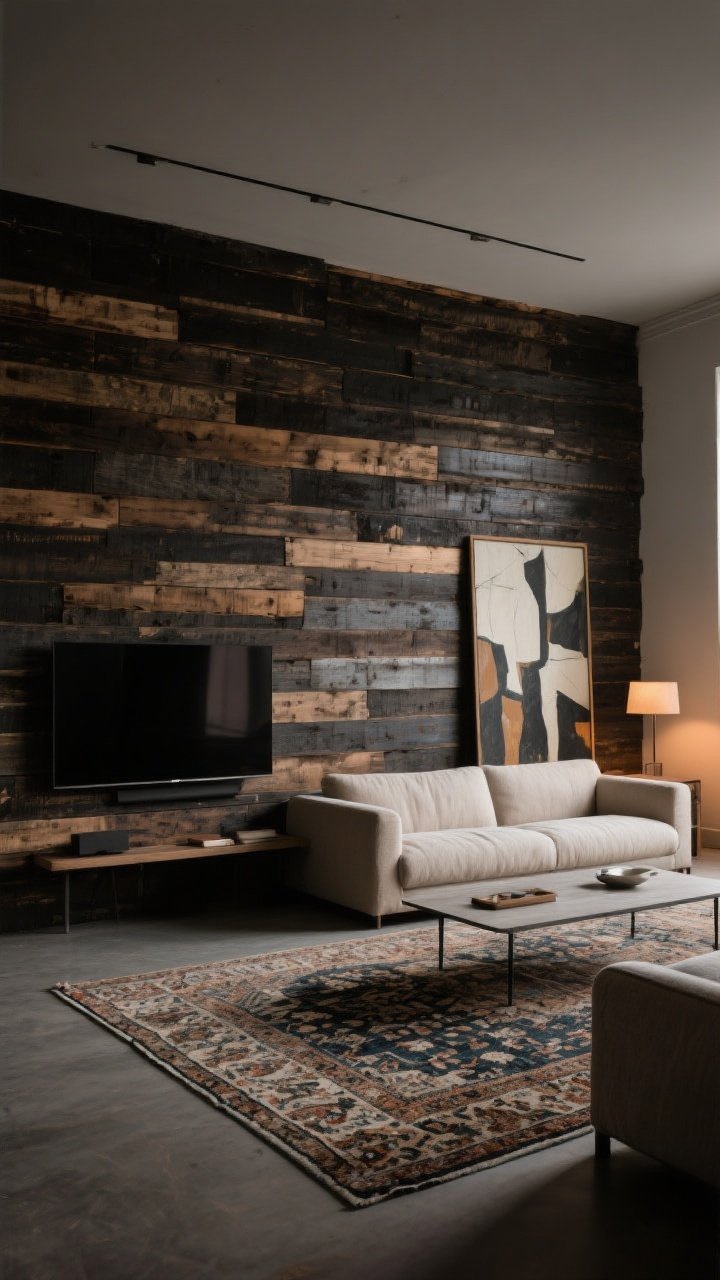
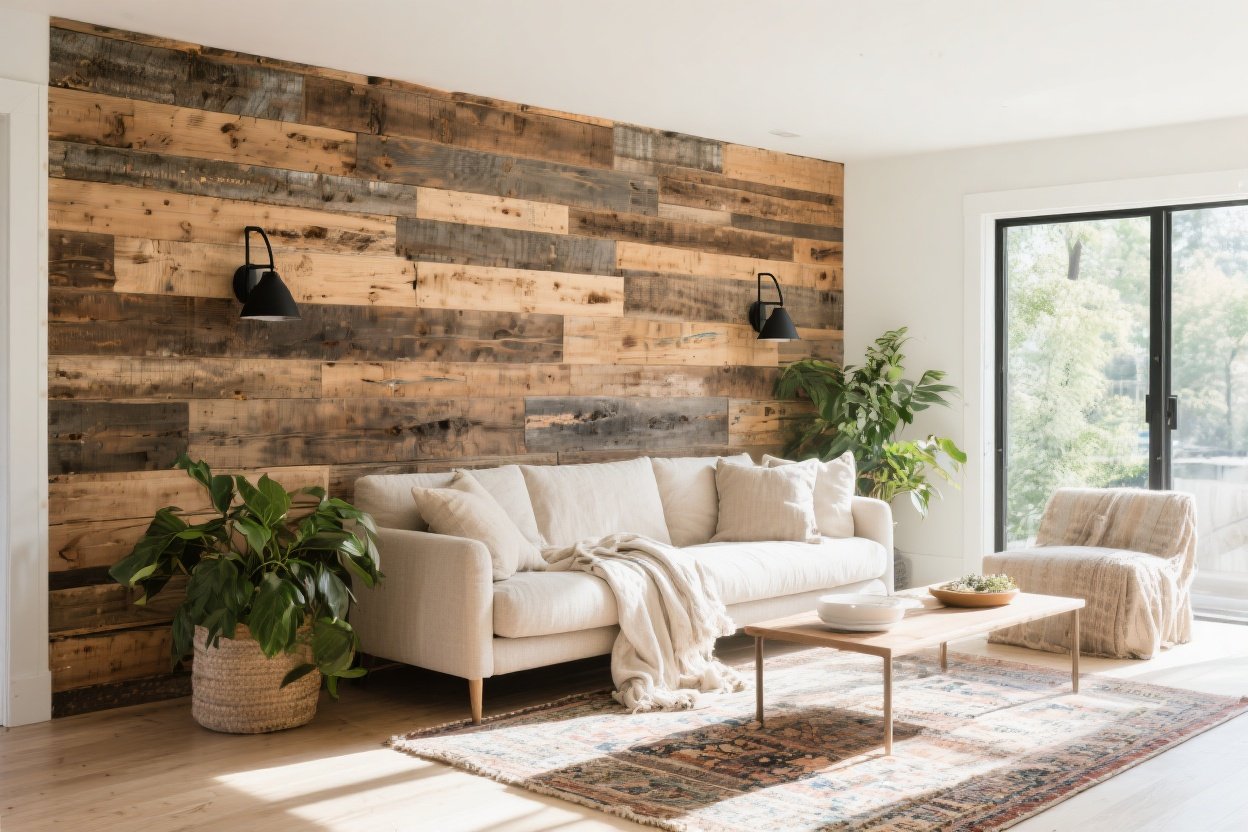
Let’s start with the classic: a full **feature wall** in the living room or bedroom. Dark, aged planks make the TV disappear, add contrast to light furniture, and turn a bland wall into a cozy focal point.
Why It Works
- Instant depth: Mixed undertones and patina create the look of a custom build.
- Design anchor: Grounds open-concept spaces and frames your seating area.
- Low maintenance: A little dust looks like “intentional texture.” We love that journey.
Pro Tips
- Go horizontal for a wider feel; go vertical to make ceilings look taller.
- Stagger plank lengths for that organic, collected-over-time vibe.
- Use a matte finish to keep the **patina** front and center—gloss can look too new.
Style it: Layer with a linen sofa, oversized art, and a vintage rug. Done. Perfect.
2. The Cozy Bedroom Headboard Wall (No Headboard Required)
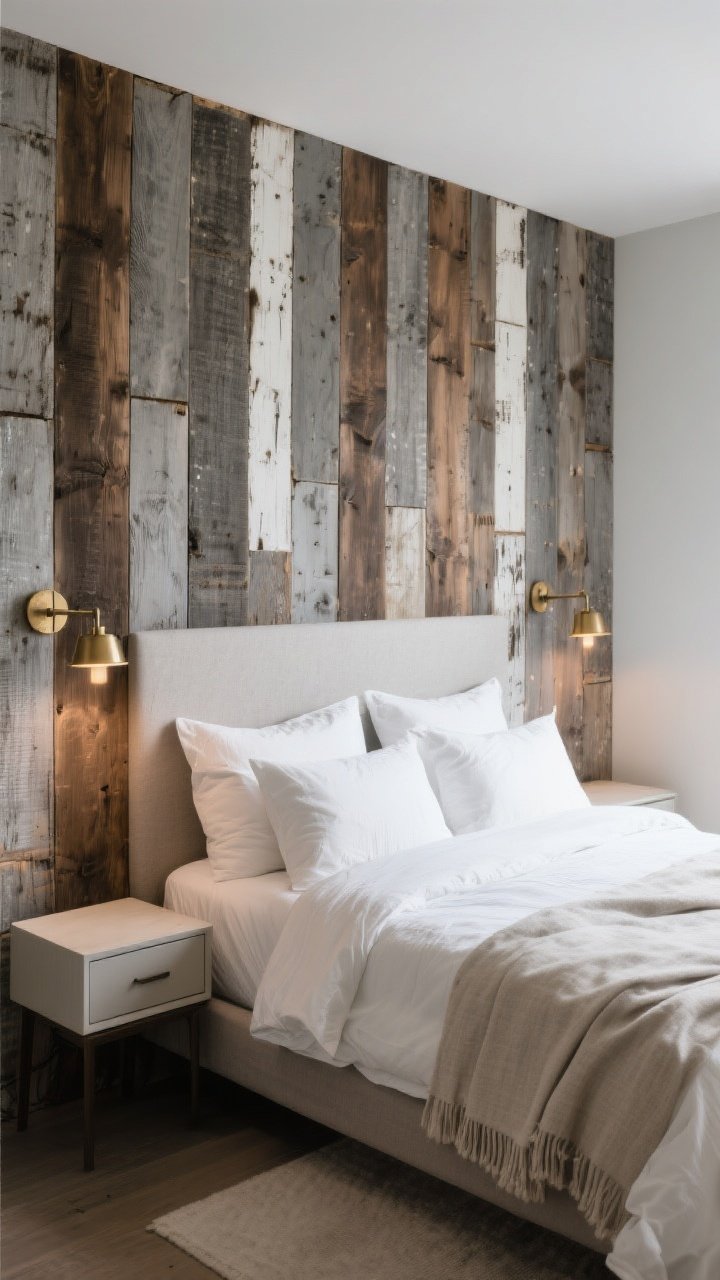
Skip the bulky headboard and wrap your bed in texture instead. A reclaimed wood wall behind the bed feels intentional and luxe—even if your mattress is still on order (no judgment).
Material Mix
- Weathered gray: Plays beautifully with white bedding and brass lamps.
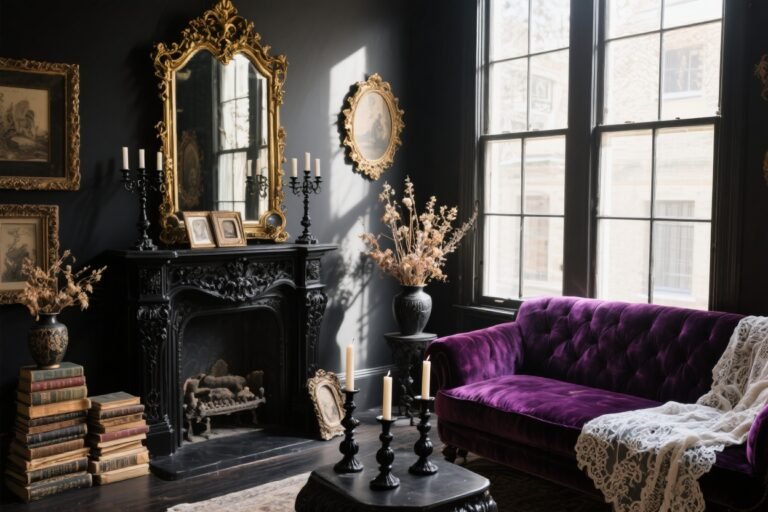
- Deep walnut tones: Add hotel-level warmth without trying too hard.
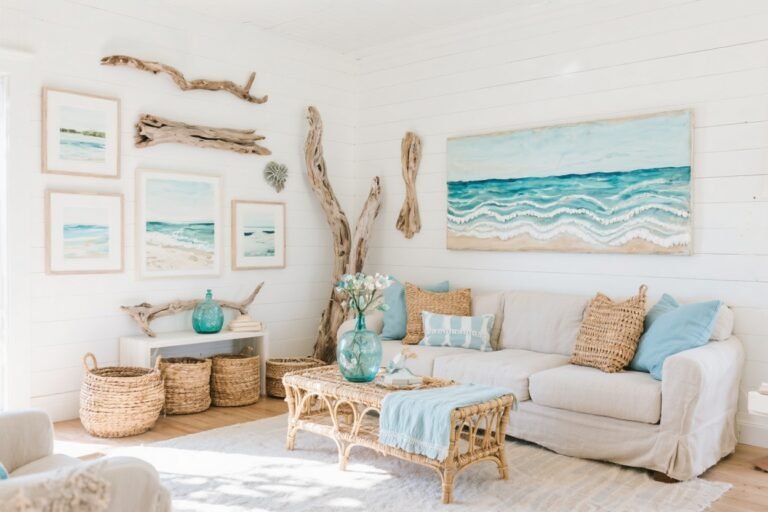
- Whitewashed boards: For that light, coastal look without the cliché seashells.
How To Nail It
- Run boards to the ceiling to elongate the room and make it feel grand.
- Add integrated sconces—wire before you plank. Future you will be grateful, FYI.
- Keep nightstands simple so the wall remains the star.
Bonus: It’s way easier to switch bedding than repaint a wall. Your decor ADD has met its match.
3. The Mixed-Tone Chevron (A Little Fancy, A Lot of Fun)
Want pattern without paint? A chevron or herringbone reclaimed wall adds movement and feels custom. It’s the “I hired a designer” look without the invoice.
Design Playbook
- Mix light and dark planks for a subtle gradient effect.
- Keep the rest of the room clean: think smooth plaster, neutral textiles, black metal accents.
- Use narrower boards for a more refined, Paris-apartment moment.
Installation Notes
- Snap a centerline and work outwards to keep the pattern symmetrical.
- Cut ends crisp and use a miter saw with a sharp blade (splintery edges kill the vibe).
- Finish with a thin trim border for a tailored, “finished” look.
Where it shines: Dining rooms, entry walls, or behind a built-in banquette.
4. The Kitchen Backsplash That Laughs at Trends
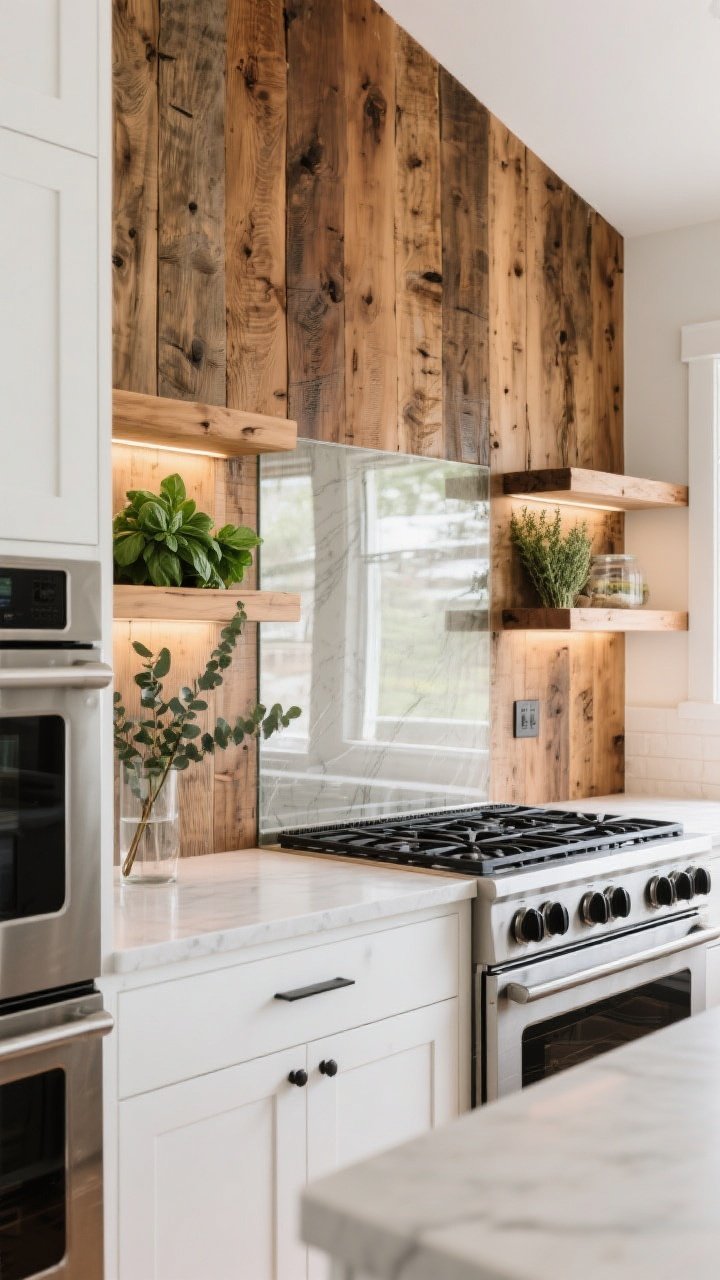
Tile is great, but a sealed reclaimed wood backsplash? That’s a wink to farmhouse style with a modern twist. It warms up metal appliances and makes white cabinetry feel less sterile.
Make It Practical
- Use dense, stable woods like oak or chestnut to minimize movement.
- Seal with a food-safe, heat-resistant finish—two coats at least.
- Install a wipeable panel (glass or acrylic) behind the stove if you cook a lot. IMO, a game changer.
Styling Ideas
- Matte black hardware + reclaimed wood = chef’s kiss.
- Open shelves allow the wood to peek through without feeling heavy.
- Bring in greenery—basil, thyme, or eucalyptus in slim vases.
Pro move: Run the wood to the ceiling behind shelves for vertical drama.
5. The Moody Powder Room That Makes Guests Whisper “Wow”
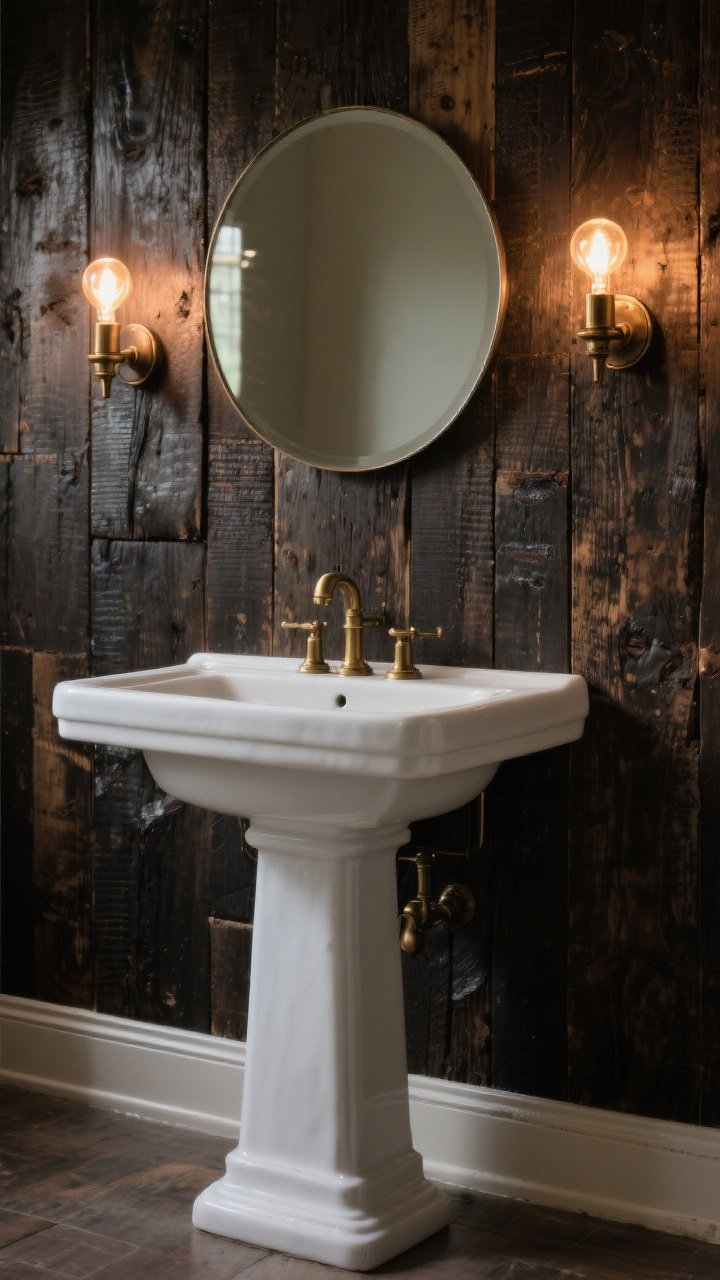
Small space? Big moment. A reclaimed wood wall in a powder room adds intimacy and makes the mirror and faucet pop like jewelry.
Go Bold
- Choose darker planks for contrast against a crisp white sink.
- Add a round mirror and ebonized or unlacquered brass fixtures for glow.
- Layer in a tiny sconce pair—warm bulbs only, please.
Durability Tips
- Use a water-resistant finish and leave a micro gap below the vanity for mop space.
- Ventilation matters—good fan, happy wood.
- Consider half-wall paneling with tile below if splash zones worry you.
Result: It feels like a boutique hotel—you’ll catch people taking mirror selfies.
6. The Built-In Nook With Texture To Spare
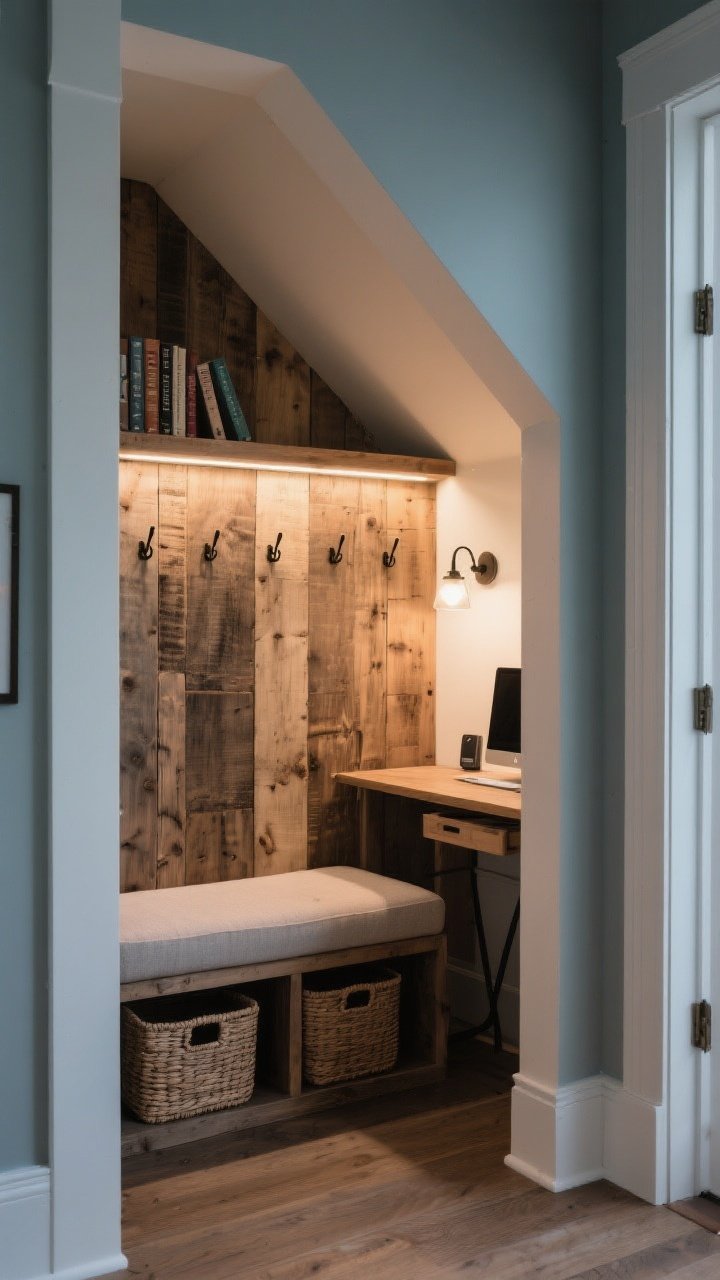
Got an awkward nook, hallway bump-out, or under-stairs space? Line the back wall with reclaimed wood and suddenly it looks intentional and curated.
Where To Use It
- Reading nook: Wood backdrop + cushion bench + library sconce = cozy central.
- Entry drop zone: Hooks, a slim shelf, and baskets below—instant organization.
- Home office alcove: Frame your desk and Zoom background with character.
Design Details
- Opt for narrower boards to suit smaller spaces—less visual bulk.
- Paint surrounding trim the wall color to let the wood pop.
- Hide LED strip lights in a shelf lip for a soft, museum-y glow.
FYI: This is the easiest way to make a builder-basic layout feel architectural.
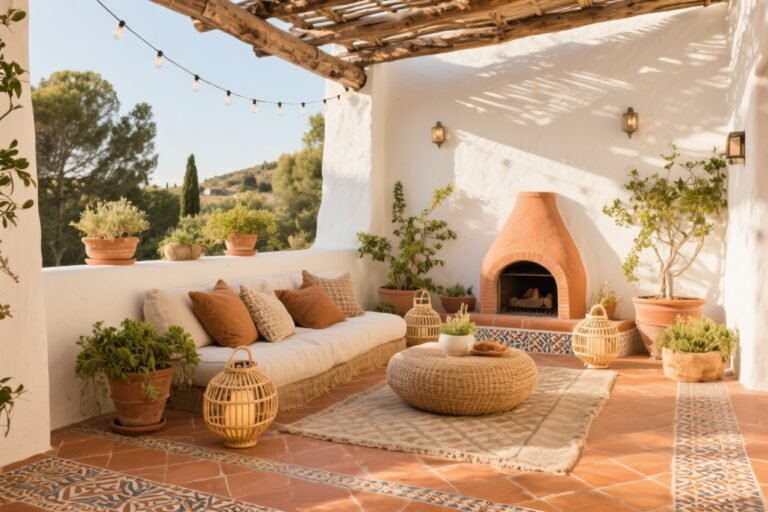
7. The Outdoor-Ready Accent That Blurs Inside and Out
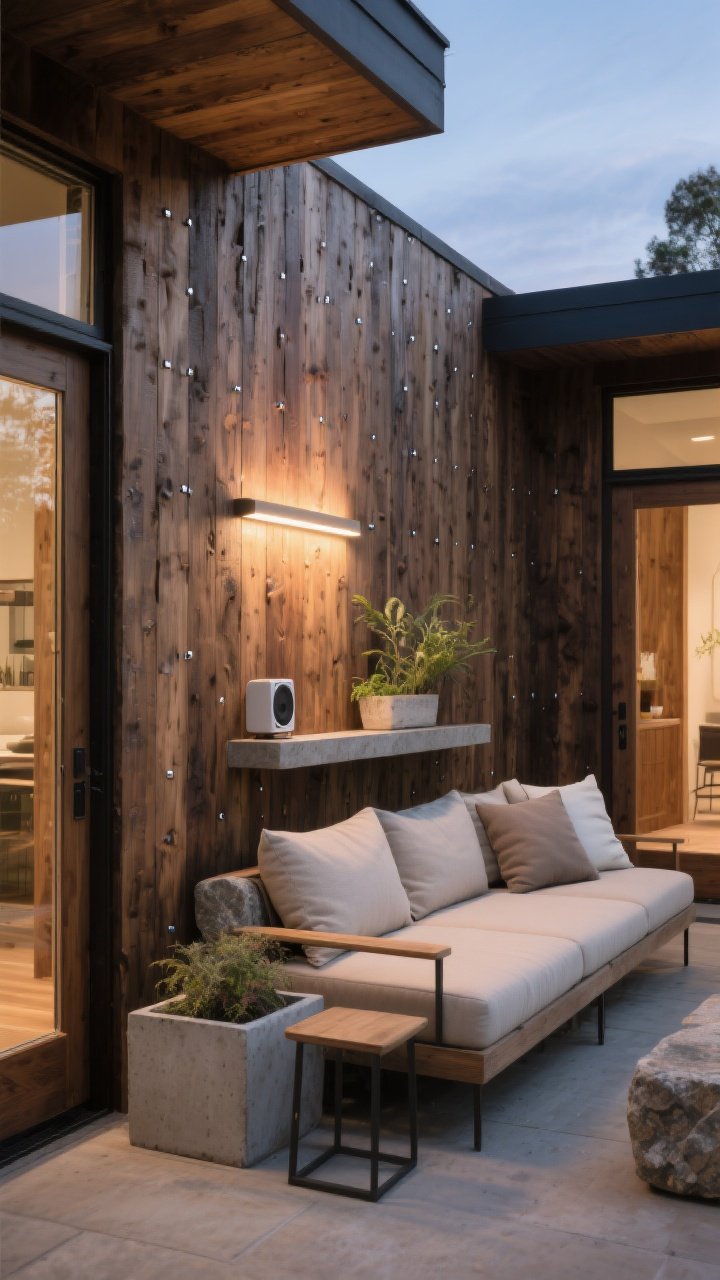
Bring the vibe outside with a reclaimed wood wall on a covered patio, screened porch, or balcony. It turns a simple seating area into a full-on lounge.
Weather-Smart Choices
- Choose rot-resistant species like cedar or teak when possible.
- Use exterior-rated finishes and stainless or coated fasteners.
- Leave small expansion gaps—outdoor wood expands and contracts like a drama queen.
Styling the Space
- Mix in stone, concrete, and linen to keep it elevated, not cabin cosplay.
- Mount an outdoor-rated sconce or linear light for evening ambiance.
- Add a slim console or ledge to hold drinks, plants, or speakers.
Pro bonus: Repeat the same wood tone indoors for a seamless indoor-outdoor flow.
How To Source Reclaimed Wood Without the Drama
- Local salvage yards: Ask about origin and species. Check for nails and warping.
- Demolition sales: Great stories, better prices—bring gloves and a magnet.
- Architectural resellers: Often cleaned, milled, and ready to install.
- Alternative: Look for “reclaimed-look” engineered boards if humidity is a concern.
Prep and Installation Basics
- Acclimate: Let boards sit in the room for 3–5 days before install.
- Clean and de-nail: Wire-brush dirt, remove metal, and sand sharp edges lightly.
- Backer and battens: Use furring strips or a plywood backer if walls aren’t perfectly flat.
- Adhesive + nails: A combo prevents seasonal movement from telegraphing.
- Finish thoughtfully: Hardwax oil or matte poly keeps texture while protecting.
Color and Finish Cheat Sheet
- Cool grays: Pair with black, white, and chrome for modern vibes.
- Honey and chestnut: Cozy with cream walls and cognac leather.
- Deep espresso: Dramatic with jewel tones and brass accents.
- Whitewash: Airy with linen, rattan, and pale stone.
Lighting Makes the Texture Sing
- Use wall washers or adjustable sconces to graze the surface and show off saw marks.
- Choose warm bulbs (2700–3000K) to enhance wood’s natural tones.
- Dimmer switches = instant mood control. You’re welcome.
Maintenance and Real-Life Stuff
- Dust with a microfiber wand; vacuum crevices with a brush attachment.
- Spot-clean with a damp cloth; avoid harsh chemicals that strip finish.
- If gaps appear seasonally, embrace the character—it’s wood, not plastic.
Sustainability Check (Because It Matters)
- Ask suppliers for chain-of-custody or origin info when possible.
- Reusing materials cuts landfill waste and lowers embodied carbon.
- Seal old paint surfaces if there’s any doubt—especially in pre-1978 materials.
Quick Cost + Time Reality
- DIY cost: $4–$12/sq ft depending on source and prep; custom milling adds more.
- Time: A weekend for a small wall; longer for patterns like herringbone.
- Tools: Stud finder, level, miter saw, nailer, adhesive, sander, safety gear.
Final Styling Formula: Texture on the wall, softer textures in textiles, one shiny metal, one matte black moment, and something organic (plant or pottery). That’s your foolproof mix.
Ready to give your walls a backstory? Pick one of these seven reclaimed wood wall ideas and go for it. It’s the kind of upgrade that makes your space feel curated, collected, and cool—like you found the perfect vintage jacket and it just fits. Now grab your nail gun and make some magic.