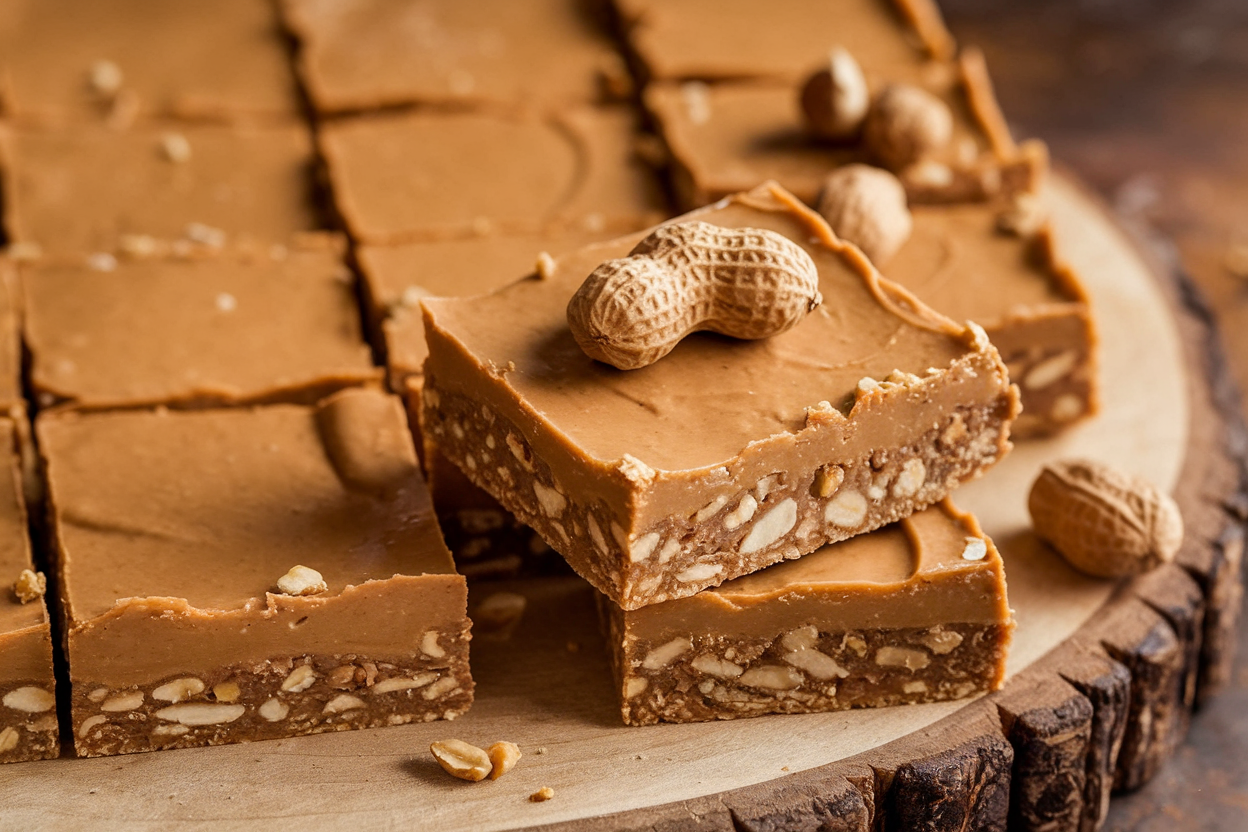
Stop Baking, Start Snacking: No-Bake Vegan Peanut Butter Bars That Vanish in Minutes
You want dessert that hits like a candy bar but behaves like a meal prep hero. These No-Bake Vegan Peanut Butter Bars are creamy, chewy, chocolatey, and require exactly zero oven time. If you can stir a bowl and press a pan, you’re basically a pastry chef now.
They’re gluten-free friendly, made from pantry staples, and disappear faster than you can say “store-bought who?” Ready to upgrade your snack game without wrecking your schedule or your budget?
What Makes This Recipe So Good
- Zero bake time: No preheating, no waiting. Mix, press, chill, devour.
- Simple ingredients: Common pantry items transform into a legit dessert bar.
- Textural contrast: Soft, nutty base + snappy chocolate topping = chef’s kiss.
- Customizable: Swap nut butters, add crunch, tweak sweetness. You’re the boss.
- Nutrient-dense: Healthy fats, fiber, and natural sweeteners make this feel-good indulgence.
- Meal-prep friendly: Keeps beautifully in the fridge or freezer for quick snacks all week.
Shopping List – Ingredients
- Natural peanut butter (1 cup; smooth or crunchy, unsweetened preferred)
- Pure maple syrup (1/3 cup; or agave syrup)
- Coconut oil (1/4 cup, melted; divided for base and topping)
- Vanilla extract (2 teaspoons)
- Rolled oats (2 cups; gluten-free if needed), pulsed into oat flour
- Fine sea salt (1/4 teaspoon; adjust to taste)
- Dark chocolate chips (1 cup; dairy-free/vegan)
- Flaky sea salt (optional, for topping)
Optional add-ins: Chia seeds (1–2 tablespoons), crushed peanuts (1/3 cup), shredded coconut (1/4 cup), or a dash of cinnamon.
Step-by-Step Instructions
- Prep your pan: Line an 8×8-inch square pan with parchment, leaving overhang for easy lift-out.
Lightly grease the sides if you’re fancy.
- Make oat flour: Blitz rolled oats in a blender or food processor until fine and flour-like. Don’t overthink it; a little texture is fine.
- Mix the base: In a bowl, stir together peanut butter, 3 tablespoons melted coconut oil, maple syrup, vanilla, and sea salt until smooth. Fold in the oat flour until a thick dough forms.
If it’s too dry, add 1–2 teaspoons plant milk. Too sticky? Add a bit more oat flour.
- Press the base: Transfer the mixture to the pan.
Press firmly into an even layer using a spatula or the bottom of a measuring cup. Compact = clean layers.
- Chocolate topping: Melt chocolate chips with 1 tablespoon coconut oil in the microwave (20–30 second intervals, stirring) or a double boiler until glossy.
- Layer it up: Pour melted chocolate over the base. Tilt the pan to coat evenly.
Sprinkle flaky sea salt or crushed peanuts on top if using.
- Chill: Refrigerate for 60–90 minutes until the chocolate sets. Can’t wait? Pop in the freezer for 25–30 minutes.
- Slice: Lift the slab out using parchment.
Warm a sharp knife under hot water, wipe, then slice into bars or squares. For ultra-clean cuts, let bars sit at room temp for 5 minutes before slicing.
- Serve: Eat now or store for later. Just try not to “taste test” half the batch.
Good luck.
Preservation Guide
- Fridge: Store in an airtight container for up to 1 week. Layer with parchment to avoid sticking.
- Freezer: Freeze up to 3 months. Thaw at room temperature for 10–15 minutes before eating, or enjoy slightly frosty for extra snap.
- Meal-prep tip: Slice into individual bars and wrap in parchment for grab-and-go snacks.
- Avoid heat: These will soften if left out for hours in warm rooms.
Keep chilled for clean layers and firm texture.
What’s Great About This
- Budget-friendly: Oats + peanut butter = cost-effective powerhouse. No boutique ingredients required.
- Allergy-aware: Easily made gluten-free and can be nut-free with swaps (see below). Vegan by default.
- Balanced indulgence: Natural fats and fiber keep you fuller than a sugar bomb cookie.
IMO, perfect post-workout snack.
- Kid-approved: Sweet, chocolatey, and handheld. They won’t even know they’re “better-for-you.”
- Foolproof: Minimal steps, maximum payoff. Burn-proof because, well, no oven.
Common Mistakes to Avoid
- Using a dry peanut butter: If your PB is super thick, the base can crumble.
Loosen with 1–2 teaspoons melted coconut oil or plant milk.
- Skipping the salt: A pinch of sea salt makes flavors pop. Don’t fear it.
- Not compacting the base: Press firmly to avoid crumbly slices and chocolate separating from the base.
- Overheating chocolate: Burnt chocolate turns grainy and sad. Melt low and slow, stirring often.
- Slicing too cold or too hot: If chocolate is rock-hard from the freezer, it’ll crack.
Let it soften 3–5 minutes before cutting.
Variations You Can Try
- Nut-free: Use sunflower seed butter or tahini. Choose allergy-safe chocolate chips.
- Crunch factor: Add chopped roasted peanuts, rice crisps, or cacao nibs to the base.
- Protein boost: Mix 1–2 scoops vegan vanilla or chocolate protein powder into the oat flour; add a splash of plant milk if dry.
- Mocha vibe: Stir 1 teaspoon instant espresso into the melted chocolate.
- Cinnamon roll twist: Add 1 teaspoon cinnamon and 1/4 teaspoon nutmeg to the base.
- Coconut dream: Swap 1/2 cup of oat flour with finely shredded coconut for a toasty flavor.
- Double chocolate: Add 2 tablespoons cocoa powder to the base and increase maple syrup by 1 tablespoon.
FAQ
Can I make these without coconut oil?
Yes. Replace coconut oil in the base with 2–3 tablespoons extra peanut butter and 1–2 teaspoons plant milk as needed.
For the topping, use a touch of neutral oil (like avocado oil) or simply melt chocolate alone; it will set a bit firmer.
Is there a substitute for maple syrup?
Agave syrup works great. Date syrup is fine too but will add a stronger flavor and slightly darker color. Avoid granulated sugar here—it won’t bind as well.
How do I make them gluten-free?
Use certified gluten-free oats and ensure your chocolate chips are gluten-free.
Everything else is naturally GF.
What if I don’t have a food processor?
No problem. Use store-bought oat flour, or blitz oats in a blender. In a pinch, mix rolled oats into the base for a chewier texture—just press extra firmly.
Can I use crunchy peanut butter?
Absolutely.
Crunchy PB adds texture and is elite with a salty sprinkle on top. If it’s very thick, warm it slightly for easier mixing.
How sweet are these?
Moderately sweet, like a classy peanut butter cup. If you want sweeter, bump maple syrup by 1–2 tablespoons or use semi-sweet chocolate instead of dark.
How many bars does this make?
An 8×8 pan typically yields 12–16 squares, depending on how generous you’re feeling when slicing.
FYI: smaller squares vanish slower. Allegedly.
Final Thoughts
These No-Bake Vegan Peanut Butter Bars are the kind of dessert that make you feel smug about your life choices. Minimal dishes, maximum payoff, endless customization—what’s not to love?
Whether you stash them for weekday energy or serve them to impress friends, they deliver every time. Make a batch today, and try not to start planning the next one before the chocolate even sets.
Printable Recipe Card
Want just the essential recipe details without scrolling through the article? Get our printable recipe card with just the ingredients and instructions.