8 Ways to Mix & Match Patterned Tiles at Home Like a Design Pro
Patterned tiles are basically the confetti of home decor—fun, bold, and a little chaotic if you don’t know what you’re doing. The good news? Mixing and matching them isn’t scary once you learn a few smart rules. We’re talking kitchens that pop, bathrooms that feel like boutique hotels, and entryways that actually make guests say “whoa.”
Grab your grout. Let’s tile like we mean it.
1. Start With A Hero Pattern (Then Let It Shine)
Every great tile mix needs one star—the hero pattern. It’s the tile that sets the tone, carries the color story, and gets the attention. Everything else plays backup.
How to pick your hero:
- Go bold on scale or color. Big geometrics, Moroccan stars, Art Deco fans—something with presence.
- Keep it in a prime spot. Think backsplash focal point, shower wall, or entryway rug effect.
- Build a palette from the hero. Pull 2–3 colors from it for your supporting tiles.
FYI: If your hero is loud (lots of colors or busy lines), balance it with quieter partners—solids, subtle textures, or tiny repeats.
2. Stick To A Palette (But Play With Pattern)
The fastest way to make mixed patterns feel intentional is a tight color palette. Keep the hues consistent, then let the motifs and scales change.
Color rules that never fail:
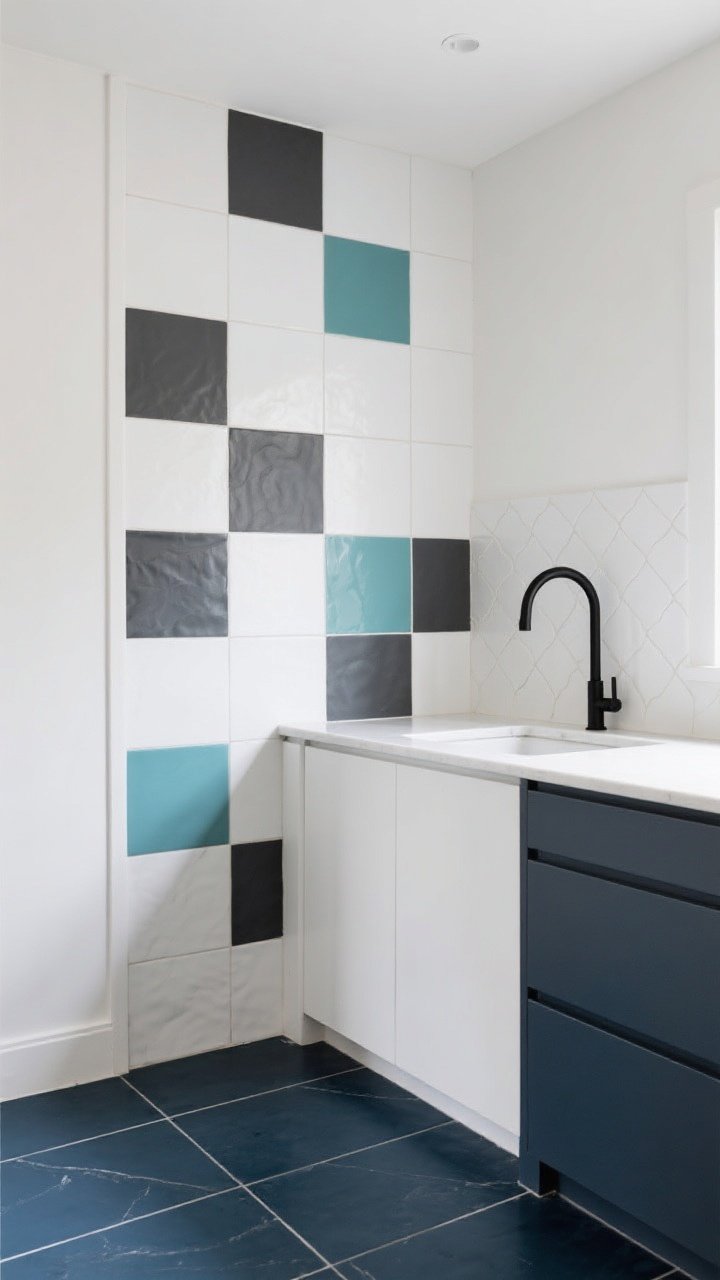
- Choose 1–2 neutrals + 1 accent. Example: white and charcoal with a dusty teal accent.
- Use the same undertone. Warm whites with warm terracotta; cool grays with icy blues.
- Repeat colors across surfaces. If the floor has navy, echo navy on the backsplash or niche.
Want drama without chaos? Monochrome patterns in black, white, and gray look layered and luxe—like a designer did it in five minutes.
3. Mix Scale: Big, Small, And Just-Right
Pattern mixing fails when everything fights at the same volume. The fix: combine different scales so the eye can rest and roam.
Three-scale formula (it’s foolproof):
- 1 Large-scale statement (big geometrics or oversized florals)
- 1 Medium-scale companion (classic encaustic or Moroccan)
- 1 Small-scale or micro pattern (penny rounds, tiny mosaics, skinny herringbone)
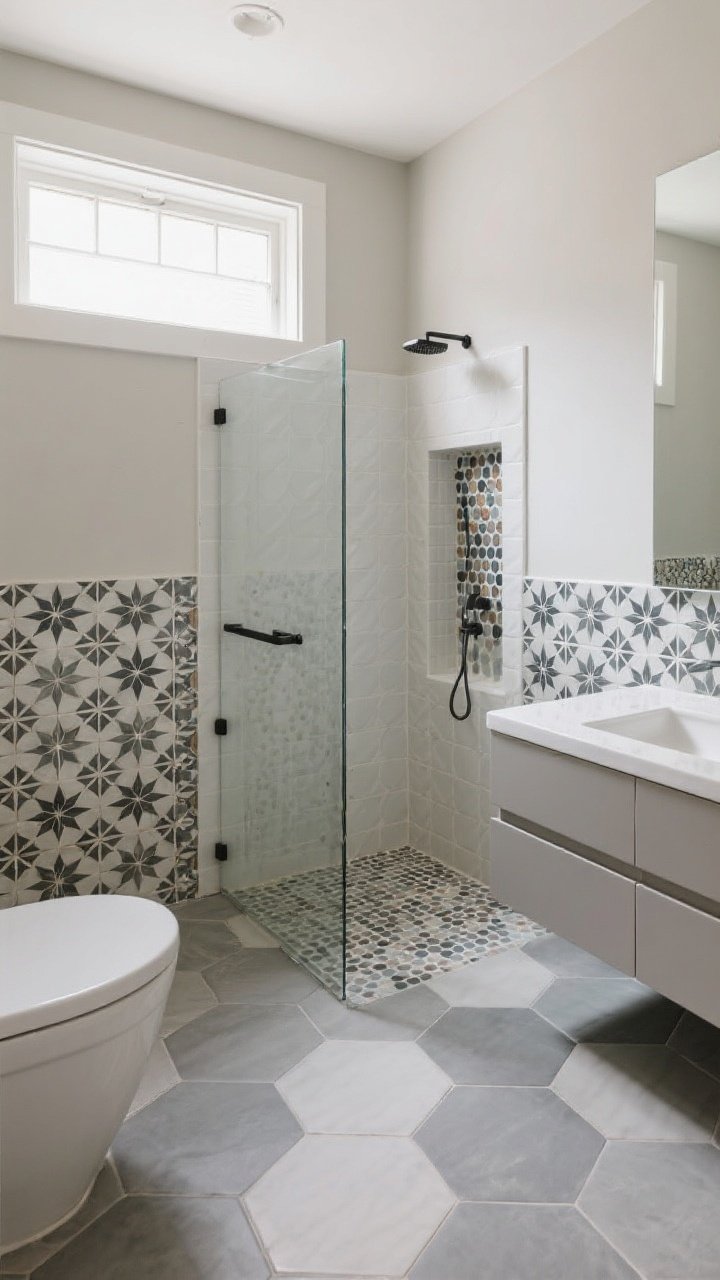
Example: Large hex on the floor, medium star-and-cross on the splash zone, micro mosaic in the niche. Balanced, layered, never boring.
4. Change Direction, Not Just Design

Even if you use the same tile, orientation can create a whole new vibe. Directional shifts add rhythm and keep your spaces from feeling flat.
Simple switch-ups that look intentional:
- Herringbone vs. vertical stack. Same subway tile, two totally different patterns.
- Diagonal set on floors. Makes tight spaces feel larger and more dynamic.
- Border flips. Frame a field tile with the same piece turned 90 degrees.
Bonus: Using the same material in different directions saves budget while still giving you that designer “mix.” Efficient and chic? Yes, please.
5. Use Grout As Your Secret Styling Tool
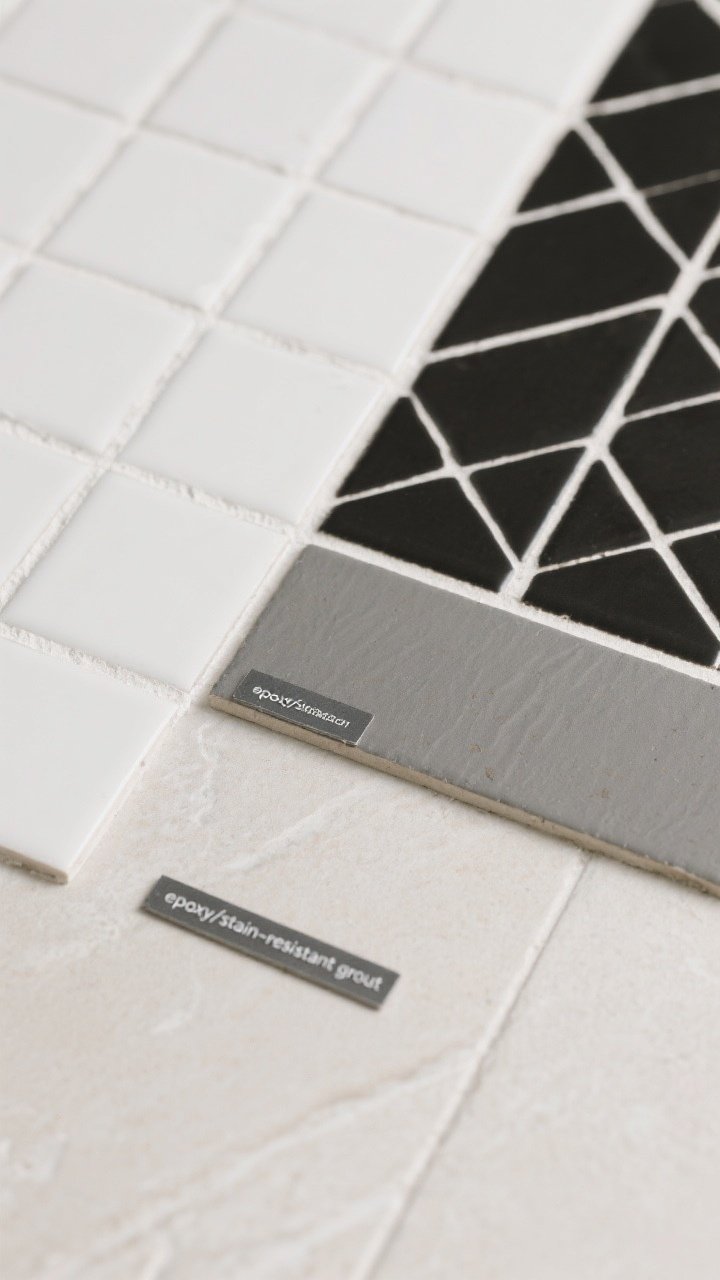
Grout is not just glue. It’s a styling decision with real impact. The color you choose can either highlight pattern or help it chill out.
Grout guidelines you’ll actually use:
- Matchy-matchy grout (same color family) = seamless, calm, and a bit softer on the eyes.
- High-contrast grout (like black on white) = crisp edges and bold pattern definition.
- Mid-tone grout = hides dirt in high-traffic zones without screaming.
Maintenance tip: Epoxy or stain-resistant grout in kitchens and baths will save your sanity. Your future self will thank you.
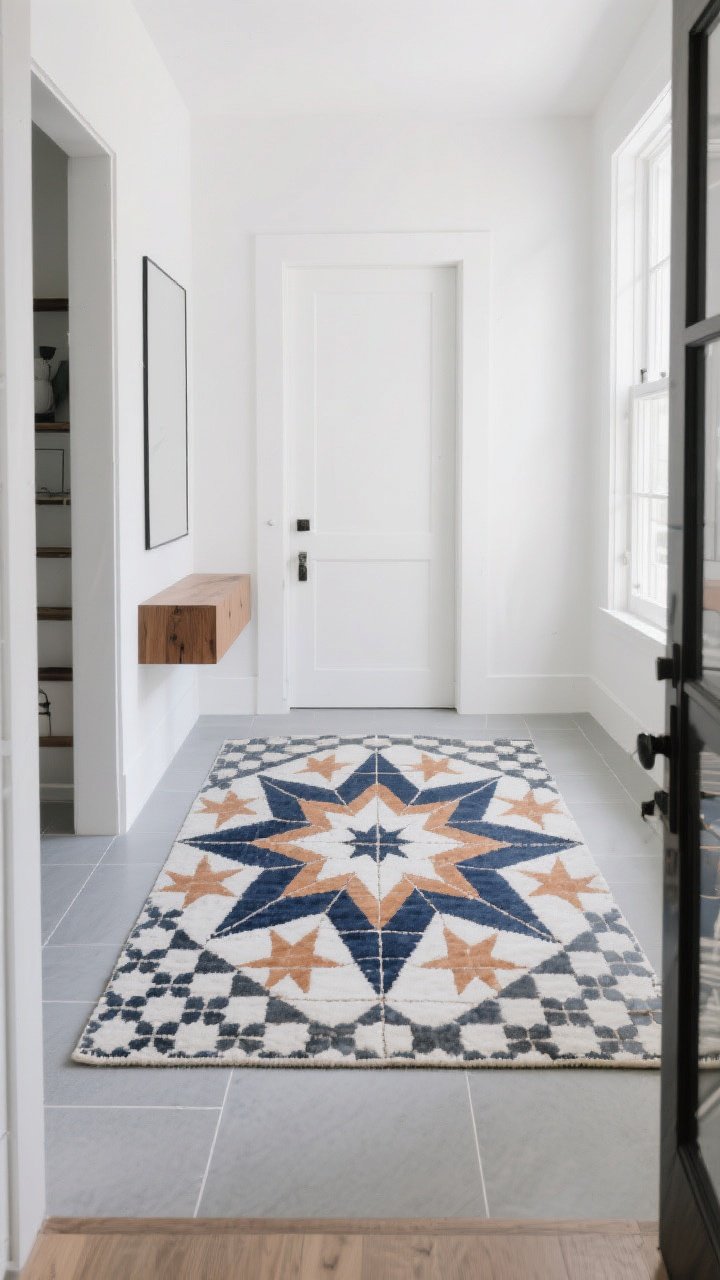
6. Zone Your Space With Pattern “Rugs”
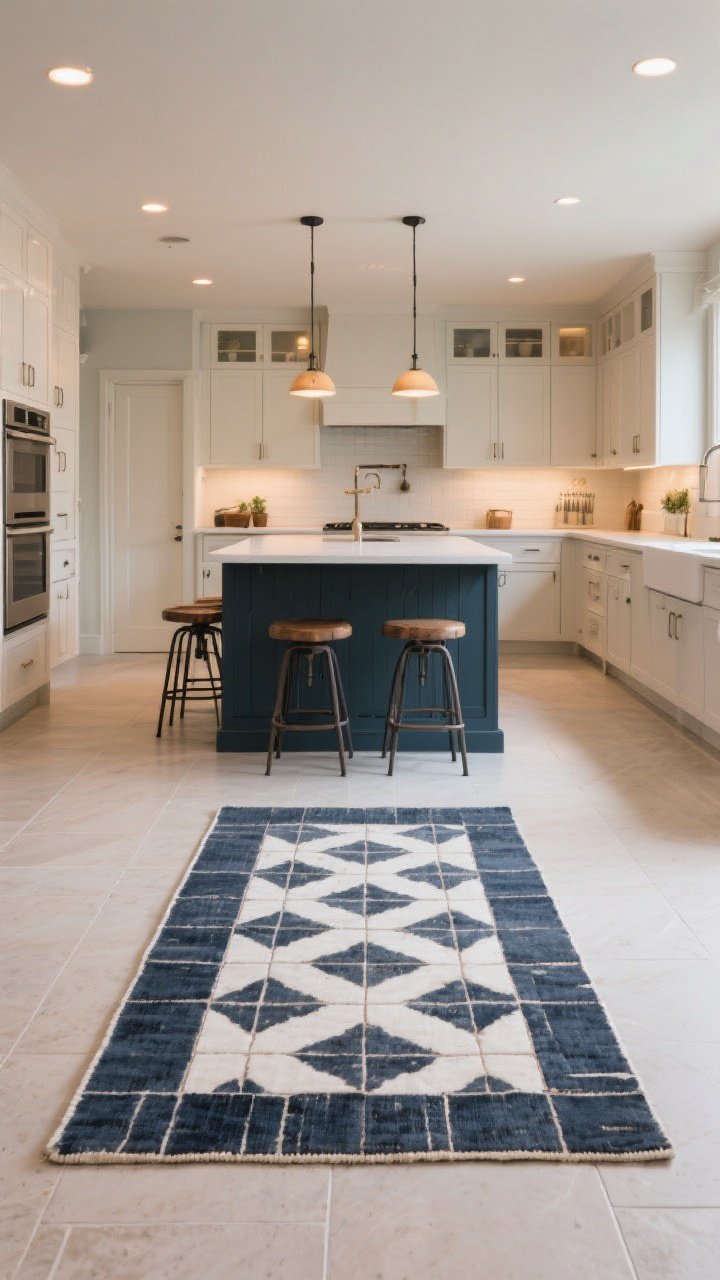
You don’t need an actual rug when you can lay one in tile. A tile rug is a patterned insert framed by a border or field tile—perfect for defining zones in open layouts.
Where tile rugs shine:
- Entryways: A patterned rectangle says “welcome” and takes muddy shoes like a champ.
- Kitchens: Under the island or in front of the range for a built-in runner look.
- Bathrooms: Centered in front of a vanity or soaking tub for boutique vibes.
Design it like a carpet: choose a hero pattern for the center, frame it with a solid or contrasting border, and keep the surrounding floor simple. Instant architecture.
7. Blend Old-World And Modern (Without A Clash)
Obsessed with both vintage encaustic patterns and clean, modern lines? Same. The trick is pairing ornate with minimal so the space feels curated, not chaotic.
Pairings that always work:
- Ornate floor + sleek walls: Think classic blue-and-white encaustic tiles with matte white stacked subway.
- Graphic backsplash + natural stone: Balance high-contrast patterns with honed marble or limestone.
- Vintage motifs + contemporary shapes: Floral cement tiles alongside elongated hex or skinny chevron.
Keep finishes consistent—matte with matte, gloss with gloss—so styles blend. IMO, mixed finishes can work, but you need a really tight palette to pull it off.
Material matters:
- Cement tiles = rich color, soft matte finish, slight variation (aka charm).
- Porcelain = durable, easy-care, and tons of patterns that mimic the real deal.
- Natural stone = organic movement that calms loud patterns.
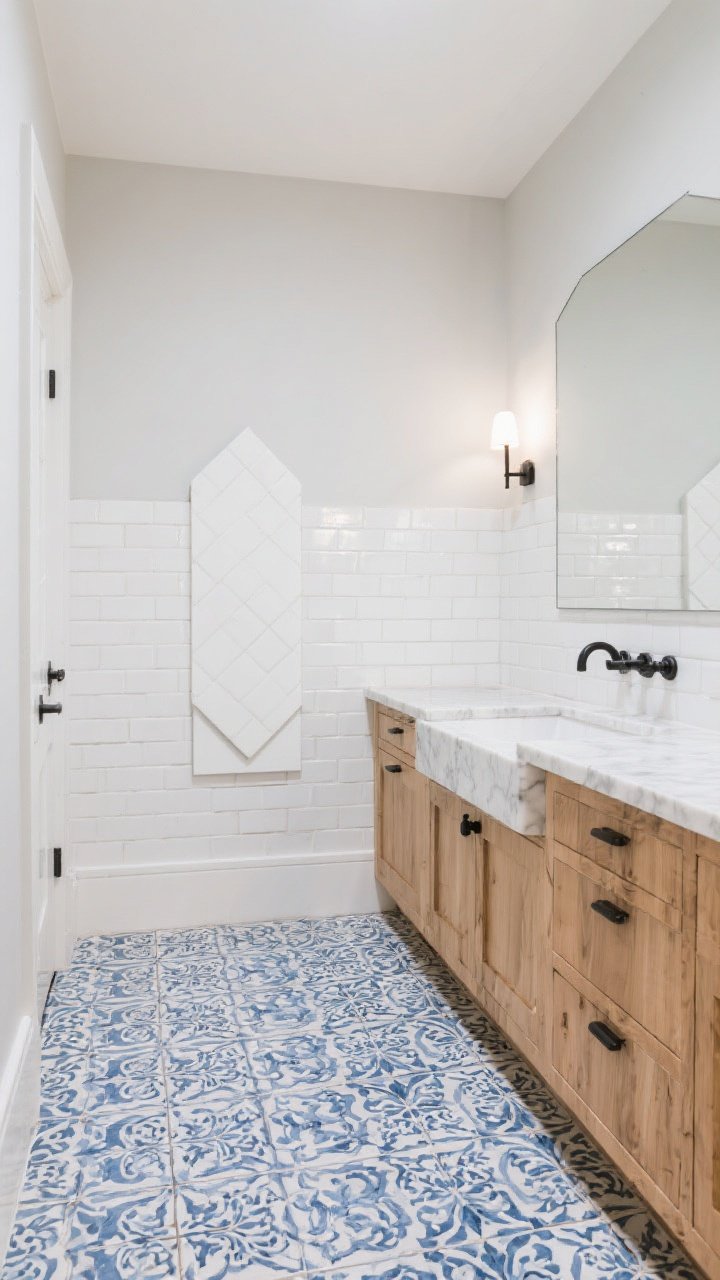
8. Edit Like A Stylist: The Two-Wall (Or Two-Surface) Rule

Here’s the part nobody likes: editing. The secret to a layered, designer look is knowing when to stop. As a rule of thumb, keep bold patterns to two major surfaces in one view.
Easy layouts to copy:
- Bathroom: Patterned floor + simple shower walls + small accent niche (micro pattern allowed).
- Kitchen: Graphic backsplash + quiet floor + solid countertop.
- Entry: Tile rug + plain border + neutral walls.
Take a quick photo and look at it in grayscale. If your eye doesn’t know where to land, simplify one surface or tone down the grout. FYI, this trick works like magic before you commit to installation.
Pro Tips For Flawless Execution
- Order extra samples. Lay them out under your actual lighting at different times of day.
- Think transitions. Use schluter strips, bullnose, or stone thresholds to separate patterns cleanly.
- Mind slip ratings. For floors, check COF/R ratings so your bathroom doesn’t become a skating rink.
- Plan the cuts. Center your pattern; avoid slivers at edges for a polished finish.
- Use mockups. A quick mood board (even on your phone) helps spot clashes before you buy.
Room-By-Room Inspiration
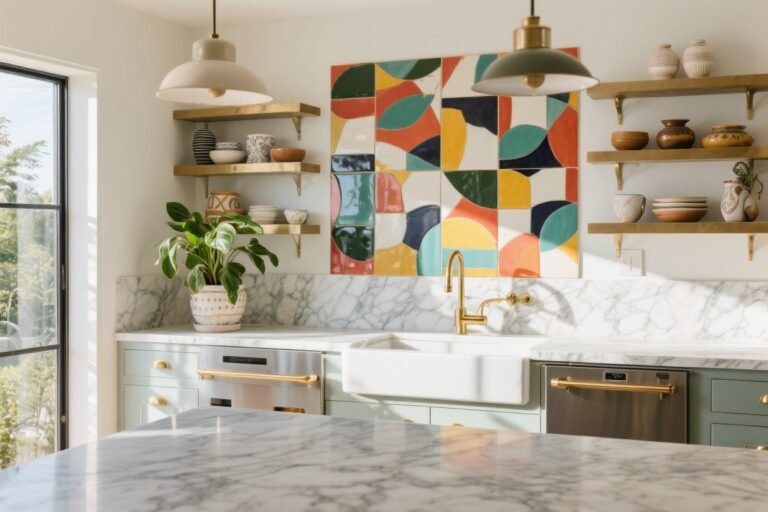
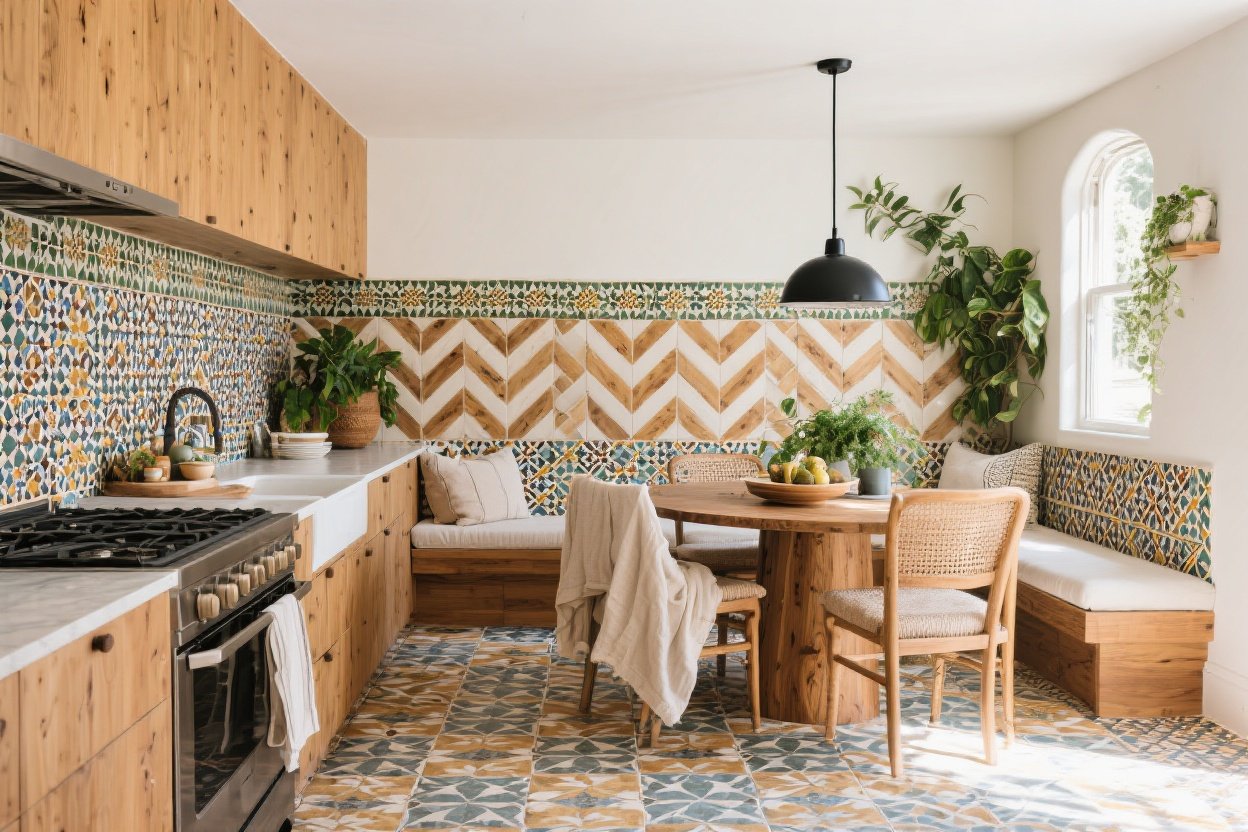
- Kitchen: Star-and-cross backsplash in navy, paired with vertical white stack-bond tile at the range niche and pale gray hex on the floor.
- Powder room: Bold encaustic floor with black grout, glossy subway wainscot, and a small-scale mosaic inside the mirror niche for a little sparkle.
- Primary bath: Large terrazzo-look floor, micro herringbone shower pan, and oversized matte chevron on the feature wall behind the tub.
- Laundry: Checkerboard porcelain on the floor, playful scallop tile backsplash, and matching grout to keep it cohesive.
One last sanity saver: calculate your overage. Order 10% extra for straight-lay, 15% for diagonals or complex patterns. Returns are easier than finding the same dye lot later.
Mixing and matching patterned tiles is like building the perfect outfit—you need one statement piece, a few great basics, and some attitude. Keep your palette tight, vary the scale, use grout to your advantage, and edit with confidence. You’ve got this. Now go make that backsplash the main character.